Dental Lab Drill Comparison: Low‑Vibration Precision Picks
By Marco Silva • 25th May

In this dental lab drill comparison, we'll look past spec sheets and brand claims to focus on what really matters for precision dental tooling: vibration, balance, control, and how your hands feel at the end of the day.
Most labs are not struggling to get more RPM; they're struggling to get consistent, low-vibration control on delicate margins, thin connectors, and acrylic surfaces without burning, chattering, or hand fatigue.
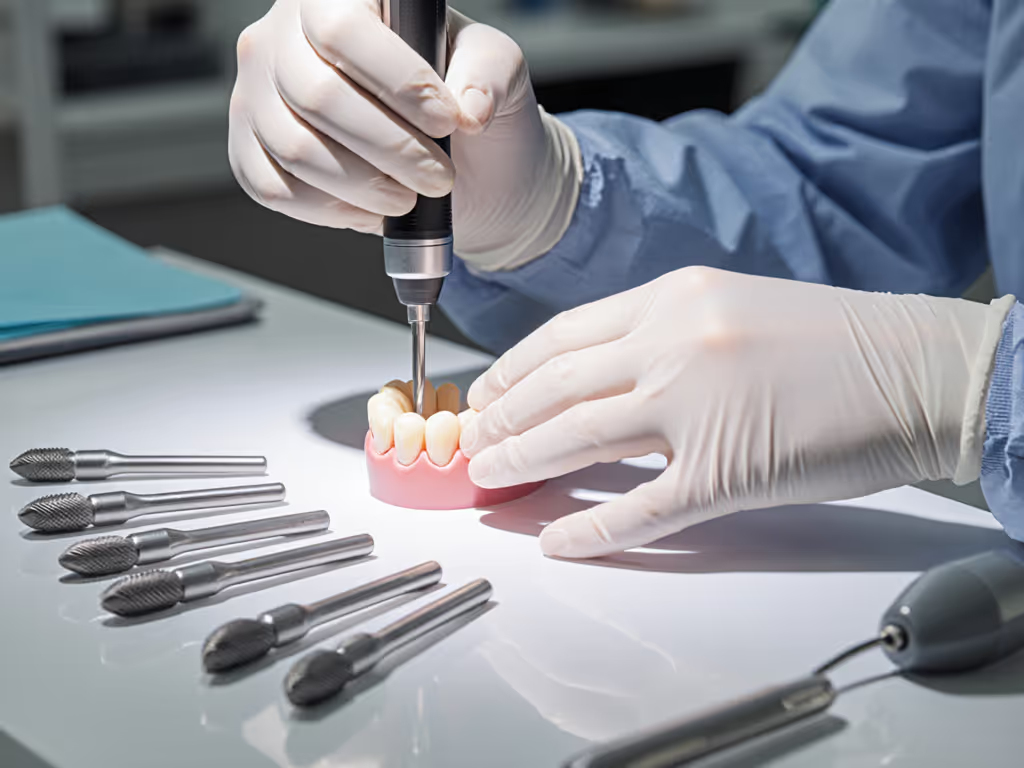
Fatigue is a hidden cost; balance beats raw weight every day.
What makes a dental lab drill truly "low-vibration"?
Low vibration is less about a marketing label and more about how the system behaves under real bench loads.
In practice, a low-vibration dental tool will:
- Track precisely without "walking" as you enter metal or acrylic
- Let you touch down on a margin without a jump or twitch
- Stay smooth when you lean slightly harder into a connector or bar
- Leave a clean, even scratch pattern instead of scallops or chatter marks
Several factors drive vibration:
-
Motor type and control
Brushless micromotors with good electronic control deliver smoother torque at low RPM than brushed or very cheap air systems. -
Runout and collet quality
Poorly machined collets or bent shafts introduce wobble. Even 20-30 microns of runout at the bur tip can feel like a buzz in your fingers and show up as chatter at the margin. -
Bur quality and balance
Off-brand or worn burs can be out of balance, creating vibration even in an excellent handpiece. -
Assembly and bearings
Higher-end lab handpieces use tighter tolerances and better bearings, which keep vibration low as the unit ages.
If you're comparing tools side-by-side, a quick practical test is this:
- Mount the same new bur in both handpieces.
- Rest the bur lightly on a polished metal plate or a glazed ceramic tile.
- Run at your normal finishing RPM and listen/feel.
On the smoother system, you'll feel less buzzing in your fingertips and see a more controlled, continuous contact patch.
A low-vibration drill isn't just more comfortable; it's a precision multiplier.
Which drill types are we really comparing in the lab?
Most dental laboratory precision work today falls into three broad tool families. Understanding their baseline behavior helps you choose the right platform for dental prosthetic drilling and acrylic finishing.
1. Electric micromotor systems (bench control box + handpiece)
- Typically brushless, with foot or knee control
- Wide, adjustable RPM range (often 1,000-50,000+)
- Strong low-speed torque (great for metals and controlled trimming)
- Generally the lowest vibration choice when well made
2. Air-driven lab handpieces / turbines
- High RPM, lighter handpieces
- Torque can drop quickly when you load the bur
- Vibration depends heavily on air quality, pressure, and handpiece condition
- Often louder and more "buzzy" in the fingers
3. Desktop rotary tools (Dremel-style)
- Sometimes used in low-budget or startup labs
- Not designed specifically for fine dental prosthetic drilling
- Typically higher runout and more vibration, especially at upper RPM
- Chunkier grip and less refined balance
Quick comparison: vibration and control focus
| Tool Type | Vibration (with good setup) | Low-Speed Control | Torque Under Load | Typical Use Fit |
|---|---|---|---|---|
| Brushless electric micromotor | Excellent | Excellent | High | Daily lab use, metal & acrylic work |
| Air-driven lab handpiece / turbine | Fair-Good | Fair | Medium-Low | Rougher work, labs with existing air |
| Desktop rotary / hobby tool | Poor-Fair | Fair | Medium | Temporary / non-critical tasks |
If your priority is low vibration and finish quality, start your dental lab drill comparison with modern brushless micromotor systems. Air and hobby tools can have a place, but they are at a disadvantage for fine margins and day-long comfort.
How do I read specs so they mean something at the bench?
Spec sheets don't show how your hand will feel after six hours of coping and polishing. For a plain-English breakdown of torque, RPM, chuck size, and battery metrics in power drills, see our drill specifications guide. To translate specs into people-first metrics, focus on:
-
Speed range (RPM)
- Look for a usable range from roughly 5,000-35,000 RPM for most acrylic work drills and metal finishing.
- Ultra-high top speeds are pointless if the tool is rough at the lower speeds where you actually work.
-
Torque and power delivery
- Few manufacturers list torque in Nm in a way that's comparable, so use "under-load behavior" as your benchmark.
- A good micromotor should maintain speed when you apply moderate pressure in Co-Cr or titanium without a big drop in pitch.
-
Runout tolerance
- If a maker publishes a runout number at the collet or tip, treat that as gold. Lower microns = smoother feel and higher dental laboratory precision.
- If no numbers are provided, rely on comparative feel tests and known reputations.
-
Weight and balance
- Don't look at grams in isolation. A slightly heavier but shorter, well-balanced handpiece often feels lighter than a long, nose-heavy one.
- Hold it the way you'd actually work (elbow anchored, wrist neutral, fingers guiding).
-
Control options
- Foot or knee controls that allow fine modulation reduce the need for start-stop taps, which lowers vibration spikes and fatigue.
- Digital speed presets can help standardize workflows between technicians.
When in doubt, prioritize tools that give clear, repeatable control at the lower to mid RPM ranges you use most, not tools that boast about top-end speed.
Which drills fit best for dental prosthetic drilling vs acrylic work drills?
Different materials telegraph vibration differently. Matching the tool to the job is one of the most effective ways to reduce strain and rework.
Metal frameworks and bars (Co-Cr, titanium)
For these:
- Favor high-torque brushless micromotors with solid low-speed control.
- You want to be able to work between 8,000-20,000 RPM with minimal chatter. For broader fundamentals on speed, bit choice, and cooling in metals that inform precision work, see our metal drilling techniques guide.
- Slightly thicker, more robust handpieces are acceptable here if the balance is good.
Signs of a good match:
- You can ease into a connector without a "jump".
- The pitch of the motor changes only slightly under load.
- Margins clean up with controlled, fine swipes instead of multiple re-approaches.
Acrylic bases, dentures, and flexible materials
For acrylic work drills:
- You still benefit from a strong micromotor, but with a lighter, slimmer handpiece to keep control during sweeping motions.
- You'll often work at higher RPM (15,000-30,000) but with very light pressure.
Here, a low-vibration setup means:
- No bouncing when cresting over contours.
- Less risk of grabbing and ripping material on thin flanges.
- Smoother scratch patterns that polish out faster.
Ceramics and zirconia (post-sinter)
Most fine adjustments here are limited and often handled with specialized systems, but the same rules apply:
- Use a stable, low-vibration handpiece with excellent runout control.
- Work within recommended speed ranges for ceramic burs and keep pressure very light.
If you routinely switch between these materials, consider a system with interchangeable handpieces: a slightly more robust one for metal and a slimmer, ultra-fine one for acrylic and ceramics, all running off the same control box.
How should a low-vibration dental tool feel in the hand?
You can learn more in five minutes of handling than in five pages of specs.
When you pick up a handpiece:
-
Grip circumference: Your thumb and middle finger should meet or nearly meet without strain. If you have to stretch or pinch, that's a red flag for wrist and finger fatigue.
-
Balance point: Rest the handpiece on one finger. The balance point should sit close to your pinch grip, not far toward the hose or nose. This reduces the lever arm your wrist must control.
-
Surface and texture: Slightly textured surfaces improve control with gloves, reducing grip force (and vibration transfer).
-
Heat build-up: A handpiece that gets warm quickly at normal working speeds forces you to relax and re-grip more often, which increases strain.
Ideally, when running at a normal working speed, the handpiece should feel like an extension of your index finger, not a tool you're fighting.
In the lab, balance over bravado always wins. A quieter, calmer tool in your hand usually means smoother margins on the die.
I once watched a junior technician rubbing their wrist after a long session on a heavy, front-loaded handpiece. We didn't change their talent; we changed the geometry and setup. Within a week, their output and confidence were both up, and the wrist rubbing stopped. That's the kind of silent improvement a low-vibration, well-balanced system can unlock.
What about ergonomics and fatigue over a full shift?
This is where low vibration really pays for itself. Slight buzzing might not bother you for one crown, but across hundreds of units per month, it compounds.
Think in people-first metrics:
- How many hours per day is your dominant hand on the handpiece?
- How often do you notice thumb, wrist, or shoulder discomfort?
- Do you see small slips or re-grinds late in the day?
Key ergonomic priorities:
-
Weight + balance, not weight alone
Slightly heavier but well-balanced handpieces can be less fatiguing than lighter, nose-heavy ones. -
Hose management
A heavy or stiff hose can pull at the handpiece, forcing your fingers to "fight" the line. Good routing and lightweight lines reduce this constant side load. -
Working posture
Keep elbow supported and close to the body, wrist in neutral, and the workpiece raised toward you instead of hunching down. -
Cadence and micro-breaks
Short, planned pauses to release grip and shake out the hand protect tendons and small muscles without hurting throughput.
Fatigue is a hidden cost; balance beats raw weight every day.
Once you see fatigue as part of your cost structure (right beside burs, investments, and alloy), you start making different tooling choices. If you're comparing tool-side solutions, our lab-tested vibration dampers comparison measures real reductions in hand fatigue on standard power drills.
Do you really need a premium micromotor, or can you make a mid-range system work?
Not every lab needs top-shelf everything. You can get low-vibration performance from mid-range gear if you stress the setup and technique.
Where premium shines:
- Tighter tolerances and lower runout
- Better bearings and longer-term smoothness
- More stable torque at low RPM
- Quieter, calmer operation (less cognitive fatigue)
How to squeeze more out of a mid-range system:
- Use high-quality burs and replace them before they vibrate or burn.
- Check and clean collets regularly; debris can introduce wobble.
- Standardize speed presets for common tasks to reduce on-the-fly fiddling.
For many labs, the sweet spot is a solid, reliable micromotor system with one high-precision handpiece and one more robust handpiece, rather than buying multiple top-tier systems.
Safety FAQ: What habits reduce vibration and strain immediately?
A safety-forward setup often feels better, too. A few quick changes can drop both vibration and injury risk:
-
Let the bur cut; don't force it.
Over-loading the tool spikes vibration, heats the work, and stresses your hand. -
Use the right bur geometry for the job.
Using an overly long or inappropriate bur amplifies runout and chatter. -
Anchor your hands.
Rest part of your hand on the bench or the workpiece to create a stable fulcrum, reducing unsteady micro-movements. -
Keep PPE and dust control in place.
Good suction and masks don't directly change vibration, but they let you relax your breathing and posture, which indirectly reduces muscle tension. -
Rotate tasks when possible.
If one technician is doing all the grinding, they are also collecting all the strain.
These are clear and calm adjustments, no heroics, just better habits aligned with how your hands and tools actually behave. For a complete checklist that keeps technique and PPE front and center, review our power drill safety guidelines.
Summary and final verdict: How to choose your low-vibration precision pick
Bringing it all together, here is a practical roadmap for choosing or upgrading your setup.
-
Start with tool family.
- For most labs, a brushless electric micromotor system is the best foundation for low vibration and high dental laboratory precision.
- Air-driven and hobby tools are situational, not ideal primary solutions.
-
Prioritize real-world behavior over headline specs.
- Judge drills by how they feel and sound under load in your actual materials.
- Look for stable RPM, minimal pitch change, and calm fingertip feedback.
-
Check ergonomics, not just power.
- Ensure the handpiece fits your grip, balances near your pinch point, and doesn't fight the hose.
- Remember: balance over bravado; you're not impressing anyone by muscling a clumsy tool.
-
Match handpieces to tasks.
- Higher-torque, slightly more robust handpieces for metals.
- Slim, ultra-precise handpieces for acrylic and fine finishing.
-
Treat fatigue as a cost line.
- If a smoother, better-balanced drill cuts rework and hand pain, it's not a luxury; it's part of protecting quality and throughput.
If you use this lens for your next dental lab drill comparison (focusing on vibration, balance, and control instead of just RPM and price), you'll end up with precision dental tooling that supports your hands, your margins, and your long-term productivity.
Related Articles