Precision Mini Drill Comparison for Model Builders
By Casey Bennett • 29th Nov
If you've ever wrestled with a standard drill on a delicate scale model project or felt your hands shake trying to pierce a perfectly straight hole in 1:72 scale detail parts, you're not alone. That's why this mini drill comparison for models matters (it's about finding the tool that matches your project's demands, not overwhelming you with power you don't need). As a fellow model builder who's seen countless hobbyists abandon projects after one frustrating slip, I know that confidence comes from those small, successful moments where your tool works with you, not against you.
Why This Mini Drill Comparison Matters for Model Builders
When you're working with delicate materials like balsa wood, plastic kits, or brass fittings, the wrong tool can ruin hours of work in seconds. I remember helping my neighbor tackle a simple bookshelf assembly (he'd sworn off projects after stripping screws on his first attempt). We started with marking pilot holes, dialing the clutch, and using a compact drill that matched the task. If clutch settings are new to you, our drill clutch basics guide explains how to dial torque for tiny fasteners. Those first successful anchors unlocked his confidence for a whole weekend of fixes. That's the power of matching your tool to the project, not just grabbing whatever's in the toolbox.
FAQs: Your Mini Drill Questions Answered
What makes a mini drill suitable for model building versus regular drills?
Standard power drills are built for construction sites, not tabletop workshops. They're too powerful, too bulky, and lack the fine control needed for scale model drilling. When I'm working on a 1:35 armor kit, I need something that lets me create a 0.5mm barrel ventilator hole without splintering the plastic (power I simply don't have with my cordless drill/driver). For perfect alignment on small parts, see our drill straight holes guide you can use without a drill press.
The right precision hobby drill gives you:
- Speed control that lets you dial down to 1,000 RPM for fragile materials
- Stability that prevents hand fatigue during extended sessions
- Accuracy to within 0.1mm for repeating identical holes
- Compact size that fits comfortably in your workspace without dominating it
What are the main types of mini drills for scale models?
Pin Vices: The Simplicity Choice
For the purest form of control, many veteran modelers swear by hand-cranked pin vices. These affordable tools eliminate power concerns entirely (you're in complete command of rotation speed and pressure). If you're building plastic aircraft kits where delicate wing struts need precise holes, a quality pin vice gives you that tactile feedback that electric tools can't match.
Corded Mini Drills: Consistent Power
These plug-in models deliver steady power without battery anxiety. Look for models with variable speed dials that let you adjust from 1,000 to 9,000 RPM (perfect for transitioning between soft balsa wood and harder brass fittings). Copper motor models often provide smoother operation, essential for clean holes in scale model work.
Remember: speed isn't king in model building. Sometimes the slowest setting on your mini drill will give you the cleanest hole in plastic without melting or cracking.
Mini Bench Drills: Maximum Stability
When you reach the stage where you're producing multiple identical models (like a fleet of naval ships), a mini bench drill becomes invaluable. These compact units typically measure around 12cm x 15cm x 22cm (small enough for any desktop), and they transform your workflow with their fixed position. The anti-slip pads keep them stable during operation, while height adjustment ensures perfect alignment for repetitive drilling.
What features should I prioritize for miniature project tools?
Don't fall for marketing claims about "maximum RPM", what matters for model building is usable precision. If specs feel confusing, our drill specifications guide translates torque, RPM, and chuck sizes into real results. Here's what to look for:
Chuck Quality A precision collet system (preferably ranging from 0.3mm to 3mm) holds tiny bits securely without runout. Cheap keyless chucks often wobble at microscopic levels that ruin scale details.
Speed Control Not just variable speed, but fine control. You should be able to hold a steady 2,500 RPM for plastic work or smoothly ramp up to 8,000 RPM for metal without jumps between settings.
Ergonomics Your hands will thank you after hours of detail work. Lightweight designs (under 1 pound) with balanced weight distribution prevent fatigue that leads to mistakes. The grip circumference should allow three fingers to wrap comfortably without straining.
Material Handling Look for drills marketed specifically for "scale model drilling" (they've been tested on the materials you'll use). A drill that works perfectly on wood might melt plastic at the same speed.
How do I choose the right mini drill for my specific projects?
This is where I emphasize what guides all my recommendations: the project drives the pick. Let's break it down by common modeling scenarios:
Beginner Plastic Kit Builder If you're assembling standard Tamiya or Revell kits, start simple. A quality pin vice costs less than $15 and teaches fundamental drilling technique without overwhelming you. You'll develop the hand control that serves you regardless of future tool upgrades.
Intermediate Detailer Adding Aftermarket Parts When you start adding photo-etched brass details or resin upgrades, step up to a corded mini drill with variable speed. This offers the precision needed for tiny brass holes while preventing the melting that can happen with excessive speed on plastic.
Advanced Modeler Producing Multiple Identical Models For serious scale modelers creating fleets or dioramas requiring identical holes, a mini bench drill provides the stability for perfect repeatability. The ability to lock your workpiece in position eliminates human error during extended drilling sessions. To keep repeatability tight, follow our drill calibration checklist for alignment and depth consistency.
What common mistakes should beginners avoid when using mini drills?
Skipping the Pilot Hole Even with mini drills, always start with the smallest bit that will guide your final size. Trying to drill a 1mm hole in one pass through styrene often causes cracking. Build up gradually: 0.3mm, then 0.5mm, then 1mm.
Applying Too Much Pressure Miniature project tools require feather-light touch. Let the bit do the work, your job is to guide, not force. If you see melted plastic or hear strain, you're pushing too hard or going too slow.
Using Dull Bits Hobby drill bits dull quickly, especially when working with abrasive materials. Change bits more often than you think necessary, certainly before each new project. Keep a magnifier nearby to inspect bit condition.
Ignoring Safety for Small Tools Don't let the compact size fool you: a 0.5mm bit spinning at 8,000 RPM can still cause injury. Always secure your workpiece (use a third hand tool or vise), wear eye protection, and keep loose clothing/hair restrained. Review our power drill safety guidelines for a complete checklist tailored to small-workpiece projects.
Finding Your Perfect Match in Model Building Drill Guide
The most transformative moment in my own modeling journey came when I stopped thinking about "the best" mini drill and started asking "which drill solves this specific problem I'm facing today?" That neighbor I mentioned? He started with anchor holes and within months was building custom shelves, because he began with a tool that matched his current project, not his aspirational workshop.
When you approach your next model build, consider these practical steps:
- Identify your smallest hole requirement (this determines your minimum bit size)
- Note your most challenging material (plastic, brass, wood)
- Determine your repetition needs (one hole vs. fifty identical holes)
That's how you move from feeling overwhelmed by options to making a confident choice that serves your actual work. Remember that confidence comes from small wins with the right setup (whether that's your first clean hole through a model ship's railing or perfectly aligned barrel ports on a tank kit).
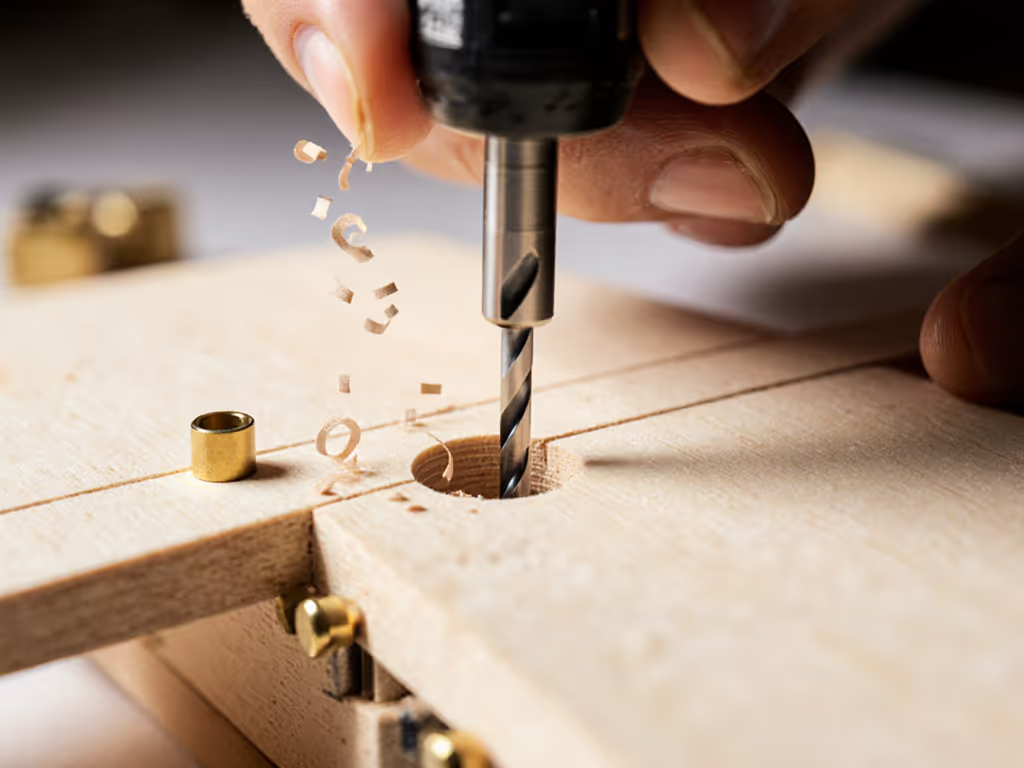
${GENRIC_IMAGE(model builder successfully using a mini drill on a scale model detail)}
Your Next Step Forward
Rather than chasing the "ultimate" mini drill (which doesn't exist for every application), focus on tools that solve your immediate challenges while leaving room for growth. Test different approaches on scrap material before committing to your actual model. Record what works for different materials and scales in a workshop notebook, this becomes your personal model building drill guide that no manufacturer can provide.
The perfect mini drill for models isn't about maximum specs: it's about delivering just enough precision, control, and stability for the work at hand. Start with your project requirements, then let those needs guide your tool selection. That's how you build not just models, but lasting confidence in your capabilities. Your next small win is waiting, ready to unlock the next level of your modeling journey.
Related Articles