Vintage vs Modern Drill Restoration: Precision for Antiques
By Casey Bennett • 12th Nov
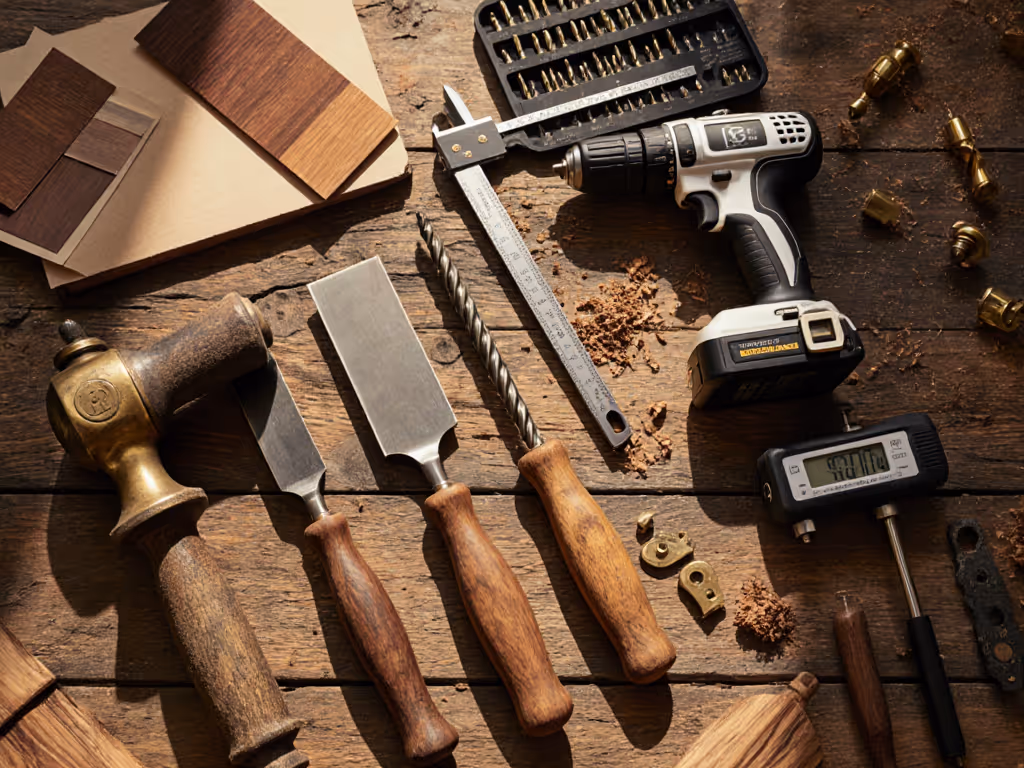
When it comes to vintage vs modern drill restoration for antique furniture repair, the right tool makes all the difference between a seamless fix and a heartbreaking mistake. As someone who's helped countless DIYers navigate their first delicate restoration projects, I've seen how the wrong drill setup can turn an exciting antique repair into a lesson in frustration. That neighbor who abandoned bookshelf projects after stripping screws? She's not alone. The truth is, confidence comes from small wins with the right setup (not maximum power). In this guide, we'll explore how both heritage woodworking techniques and contemporary drill technology serve antique restoration, so you can choose intelligently based on your specific project needs rather than marketing hype. For context on how drill technology evolved, explore our history of power drills.
Understanding the Unique Demands of Antique Restoration
Working with century-old wood requires a fundamentally different approach than modern construction. Aged hardwoods like mahogany and walnut become brittle over time, while softwoods lose their resiliency. This reality means that restoration drill precision isn't just nice to have, it is essential for preserving the integrity of your antique piece.
Unlike building new structures where brute force gets the job done, antique furniture repair demands finesse. Consider these critical factors:
- Material fragility: Wood that's dried for decades cracks easily under pressure
- Vintage fasteners: Old screws have softer metal and unique threads that strip readily
- Historical accuracy: Sometimes using period-appropriate tools maintains authenticity
- Irreplaceable components: You generally don't get second chances with one-of-a-kind pieces
Win the first hole, and you've won half the battle. That initial success builds the confidence to tackle the rest of your antique restoration project with care and precision.
Why Modern Drills Excel at Precision Work
For most beginners tackling antique repairs, modern cordless drills offer significant advantages that directly address common pain points. Their precisely engineered clutches allow you to set torque levels down to the inch-pound, which is critical when working with delicate materials that can't handle even moderate pressure.
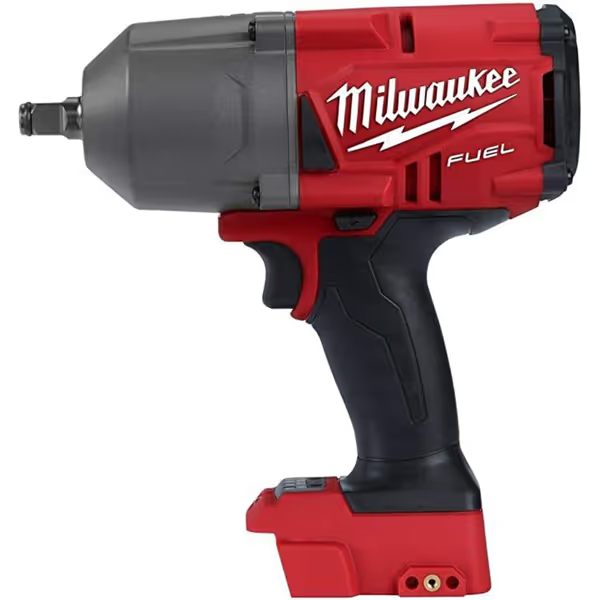
Milwaukee M18 FUEL 1/2" High Torque Impact Wrench
Unmatched power for tough fastenings and confident, hassle-free removal.
$266.7
Torque1400 ft-lbs Nut-Busting
Torque1400 ft-lbs Nut-Busting
Pros
Extreme power for rusted, stubborn bolts
Excellent for automotive and heavy-duty tasks
M18 battery platform compatibility
Cons
Trigger issues reported by some users
Durability concerns on some units
Customers find the impact wrench powerful with excellent torque and appreciate its quality and value for money.
Customers find the impact wrench powerful with excellent torque and appreciate its quality and value for money.
Consider the Milwaukee M18 Impact Wrench mentioned above, but scaled down for delicate work. Not sure when to use a drill driver versus an impact driver? See our drill vs impact driver guide. Modern compact drills give you:
- Variable speed triggers that respond to feather-light finger pressure
- Precision clutch settings with 15-20 distinct torque levels
- LED work lights illuminating tight spaces where antique joinery hides
- Consistent power delivery that doesn't vary with battery charge level
These features directly solve the "bit retention and accuracy issues" that plague so many DIYers. When restoring a Duncan Phyfe chair leg, you need that drill to stop the instant sufficient torque is applied (not a millisecond later). Modern drills with responsive clutches accomplish this where even well-maintained vintage tools often fail.
When Vintage Tools Make the Most Sense
Before dismissing vintage drills entirely, consider where they genuinely shine in antique restoration. There's a certain poetry in using period-appropriate tools for historically accurate repairs. Sometimes, traditional vs contemporary drills isn't an either/or proposition but a strategic choice based on your specific task.
For example, when:
- You're performing museum-quality restoration requiring authentic methods
- Working on pieces where modern tool marks would compromise historical value
- Repairing mechanisms designed for hand-powered tools (like certain clock components)
- Demonstrating heritage woodworking techniques to others
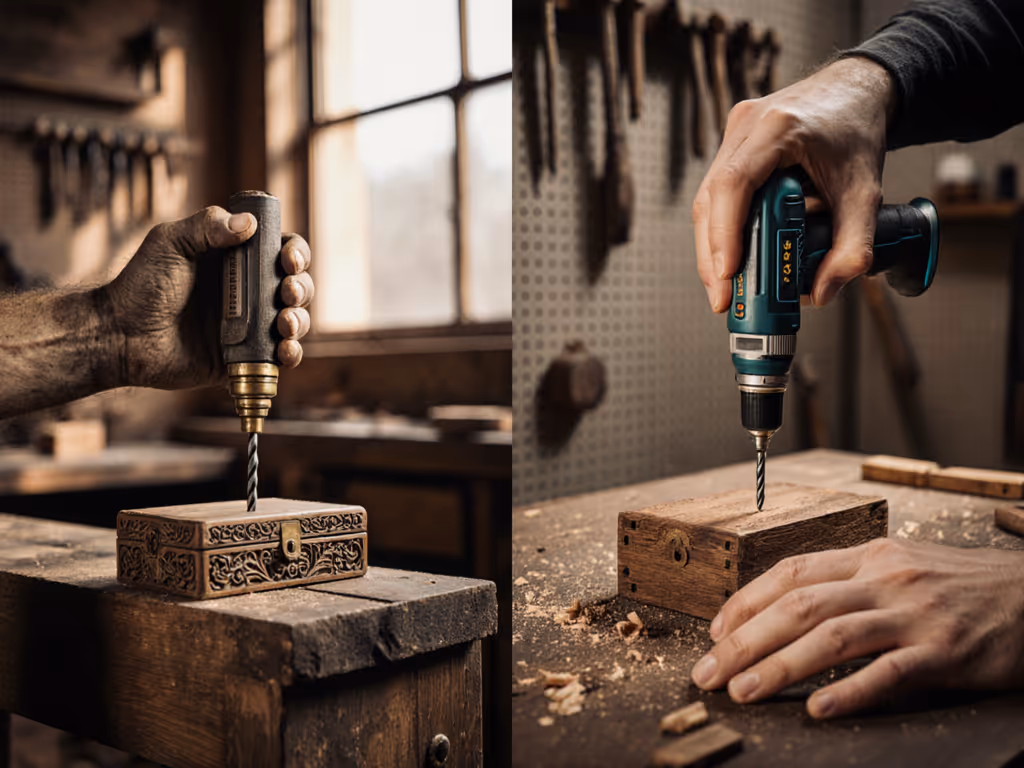
I recently advised a woodworker restoring a 1920s oak buffet who needed to replace original screws with exact replicas. For that specific task, using a reproduction hand-crank drill maintained the authentic repair approach the piece deserved. The slower speed and direct mechanical feedback prevented the tear-out that might have occurred with even the most carefully set modern drill.
The Hidden Challenges of Vintage Drill Restoration
Restoring a vintage drill for antique work presents its own set of challenges that many beginners underestimate. That charming 1940s Black & Decker on eBay might look perfect for your mission-style furniture project, but consider these realities:
- Inconsistent clutch performance: Original mechanical clutches rarely offer precise, repeatable torque settings
- Electrical concerns: Older wiring and components can be fire hazards
- Part scarcity: Finding replacement chucks or specific-sized drill bits becomes difficult
- Power inconsistency: Voltage fluctuations cause uneven torque delivery
While some enthusiasts enjoy the process of restoring vintage tools themselves (as seen in those YouTube restoration videos), the time investment often exceeds the value for someone primarily interested in furniture repair rather than tool collecting.
Setting Up for Success: Your First Antique Repair Project
The most common mistake I see beginners make? Assuming they need massive power for antique restoration. Nothing could be farther from the truth. Let's break down the setup process that will help you win the first hole:
Step 1: Match Your Tool to the Task
Start with the project, then match the drill and batteries (not the other way around). Confused about 18V vs 20V MAX labels? Our voltage naming guide clears it up. For most antique furniture repairs:
- Choose a compact drill (12V-18V) rather than high-torque models
- Opt for brushless motors that maintain consistent speed under load
- Select a model with at least 15 clutch settings for precise control
- Prioritize weight and balance over raw power
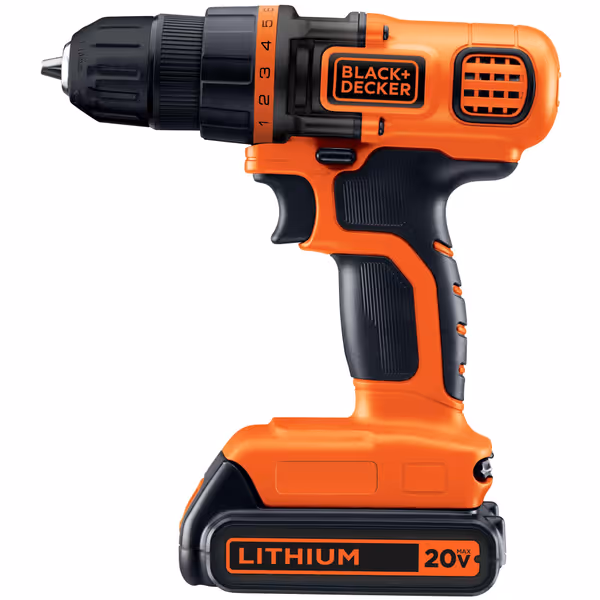
BLACK+DECKER 20V MAX Cordless Drill
Compact, lightweight drill perfect for household tasks with precise control.
$70.64
Clutch Positions11
Clutch Positions11
Pros
Lightweight & compact for reduced fatigue in tight spaces.
Precise 11-position clutch prevents material damage.
Good power for household tasks and value.
Cons
Battery life receives mixed reviews.
May lack power for heavy-duty projects.
Customers find this cordless drill to be a reliable tool that works well, particularly for driving screws and household tasks. They appreciate its lightweight design and compact size, noting it's good for smaller hands and perfect for small projects around the house. The drill offers impressive power for its size, and customers consider it good value for money. Battery life receives mixed reviews, with some praising its performance while others report issues with charging.
Customers find this cordless drill to be a reliable tool that works well, particularly for driving screws and household tasks. They appreciate its lightweight design and compact size, noting it's good for smaller hands and perfect for small projects around the house. The drill offers impressive power for its size, and customers consider it good value for money. Battery life receives mixed reviews, with some praising its performance while others report issues with charging.
The BLACK+DECKER 20V MAX mentioned above exemplifies this approach, as its 11-position clutch and lightweight design make it ideal for delicate work where heavy-handedness ruins projects. Notice how it is marketed for "all screw driving tasks". That precision is exactly what you need for antique hardware.
Step 2: Prepare Your Bits and Accessories
Using the wrong bit destroys more antique projects than any other factor. For clean, tear-out-free results, follow our wood drilling techniques. For restoration work:
- Invest in premium, sharp bits specifically designed for wood
- Use brad-point bits for clean entry holes that won't wander
- Pre-mark pilot holes with an awl to prevent tear-out
- Keep a micro-chisel handy for cleaning up any minor splintering
Step 3: Dial In Your Settings
Before touching your antique piece, practice on scrap wood of similar age and type. For most antique furniture:
- Set your clutch to level 2-4 (the lowest functional settings)
- Use low speed (400-600 RPM)
- Apply light, consistent pressure, let the bit do the work
- Back out frequently when drilling deep holes to clear sawdust
Practical Techniques for Common Restoration Tasks
Let's apply these principles to frequent antique repair scenarios. When working with antique furniture repair tools, remember that slow and steady truly wins the race.
Reattaching Loose Joints
- Clean out the joint thoroughly with a small brush
- Drill pilot holes at 70-80% of screw diameter (smaller than you'd use on new wood)
- Apply wood glue sparingly - excess glue creates cleanup headaches
- Drive screws slowly with clutch set to minimum functional torque
Replacing Stripped Screw Heads
- Create a new grip surface with a rubber band or specialized screw extractor
- Set your drill to reverse with lowest possible torque setting
- Apply inward pressure while backing out the screw
- Fill the stripped hole with appropriately sized matchstick and glue before reinstalling
Installing Reproduction Hardware
When adding new hardware to antique pieces: To keep hardware aligned and symmetrical, learn how to drill straight holes.
- Test-fit everything before drilling
- Mark depth with tape on your drill bit to prevent drilling through thin wood
- Use a backing board to prevent blowout on the exit side
- Consider period-appropriate fasteners when authenticity matters
Choosing Wisely: Your Decision Framework
The question isn't whether vintage or modern drills are "better" overall, it is which one serves your specific antique restoration needs best. Consider these factors:
| Factor | Choose Vintage Tool | Choose Modern Tool |
|---|---|---|
| Project authenticity | Museum display, historical accuracy required | Working antique being used practically |
| Material condition | Very dry, fragile wood that needs extremely slow speed | Moderately aged wood with some flexibility |
| Skill level | Experienced with hand tools, comfortable with trial-and-error | Beginner seeking consistent, predictable results |
| Project timeline | No time pressure, restoration is part of the process | Need reliable completion within a reasonable timeframe |
For most weekend DIYers working on family heirlooms, modern drills with precision controls deliver the reliability needed to avoid costly mistakes. They address the "bit retention and accuracy issues" that plague so many beginners attempting antique repairs.
Wisdom for Your Restoration Journey
After helping dozens of nervous first-time antique restorers, I've learned that the most successful projects begin with managing expectations. That neighbor I mentioned at the start? Her "aha" moment came not from a powerful drill, but from marking pilot holes, dialing the clutch down to the minimum setting, and using a compact drill that fit comfortably in her hands. Win the first hole with confidence, and suddenly that entire bookshelf project becomes possible.
Whether you choose to embrace heritage woodworking techniques or leverage modern drill precision, remember that the goal isn't to demonstrate tool prowess, it is to honor the craftsmanship of the original piece while ensuring its survival for future generations. Your careful attention to detail in selecting the right tool for each stage of restoration speaks louder than any specification sheet.
As you stand before your next antique restoration project, take that deep breath, set your clutch one level lower than you think you need, and remember: the right tool properly set up turns anxiety into accomplishment, one perfect hole at a time. What antique project will you tackle next with renewed confidence?
Related Articles